How To: Enter Orders
Orders will not be saved automatically unless you add a product line to them.
Once you have orders from your customers, you can enter them into the system. You can do this in multiple ways:
1: Go to Sales - Orders and click Create Order in the bottom right.
2: Go to Contacts - Outlets and click the three-dot menu next to a customer and click Create Order.

3: Use the search function at the top of the screen to find a customer, click to open the customer and then click Create Order in the bottom right.


4: Use the + symbol at the top of the page and select New Order.

For web orders, go to Integrations - Click into the relevant integration and click Import Orders to download new orders into the system. These will then appear in Sales - Orders. This will only be necessary if you do not have run automatically turned on for the integration.
Order Setup:
If all your default information is correct, simply select the Outlet the order is for.
If not, you can make changes to these fields. Any field marked with an asterisk (*) is mandatory and must be filled before proceeding further.
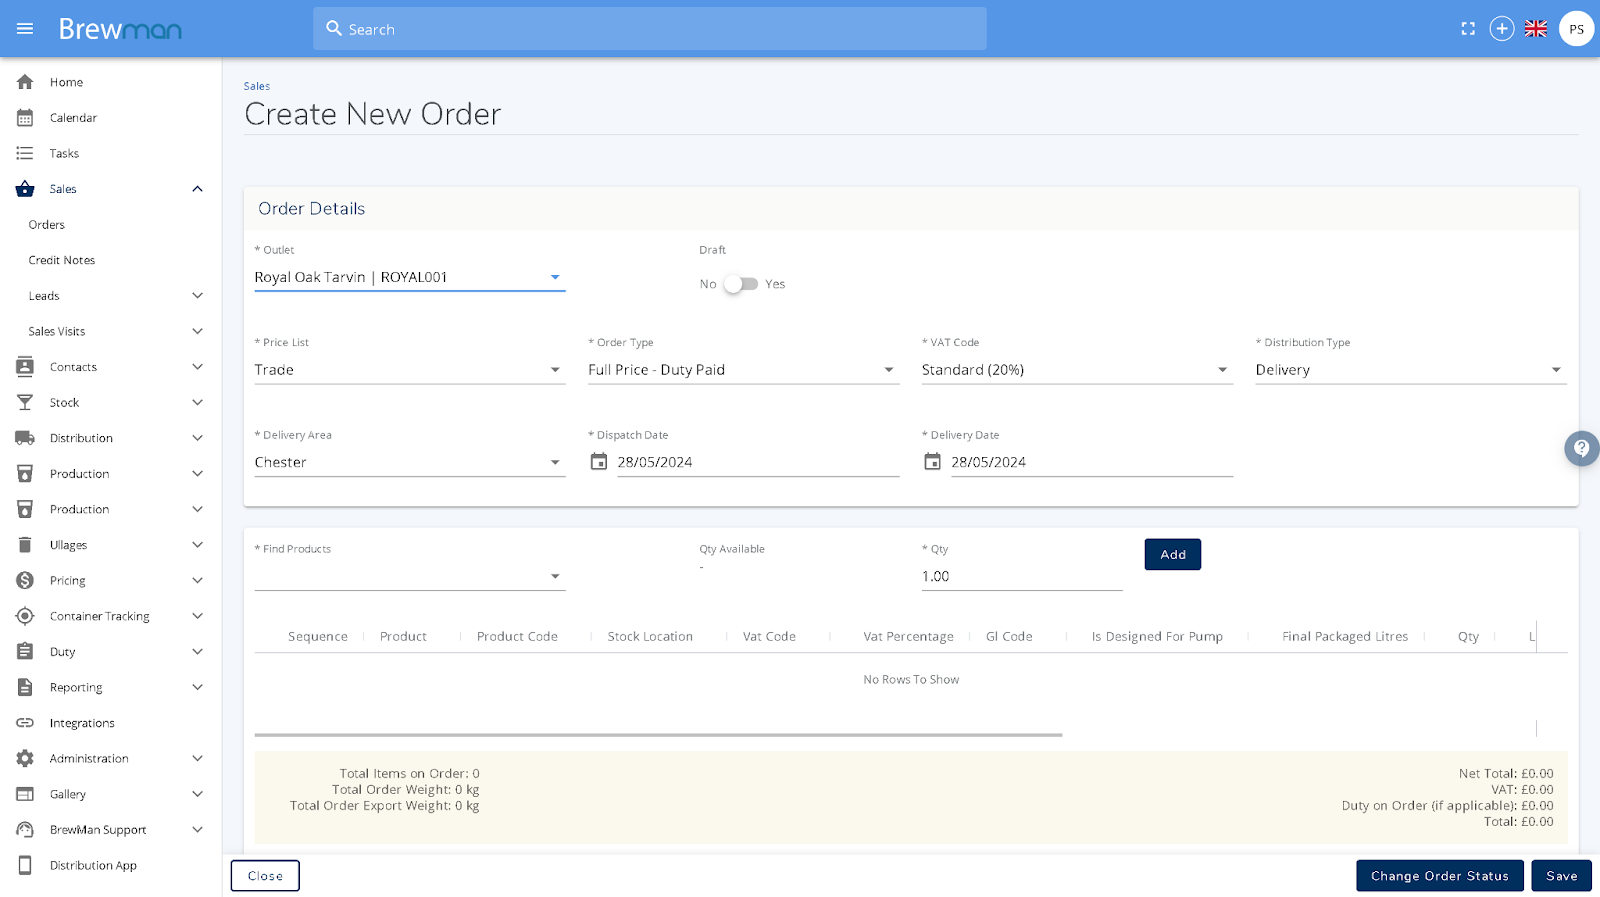
- * Outlet - Select the Outlet using the dropdown list.
- Draft Toggle - Switch this to yes or no depending on whether this order is a draft or not (Allows Pro-Forma invoicing).
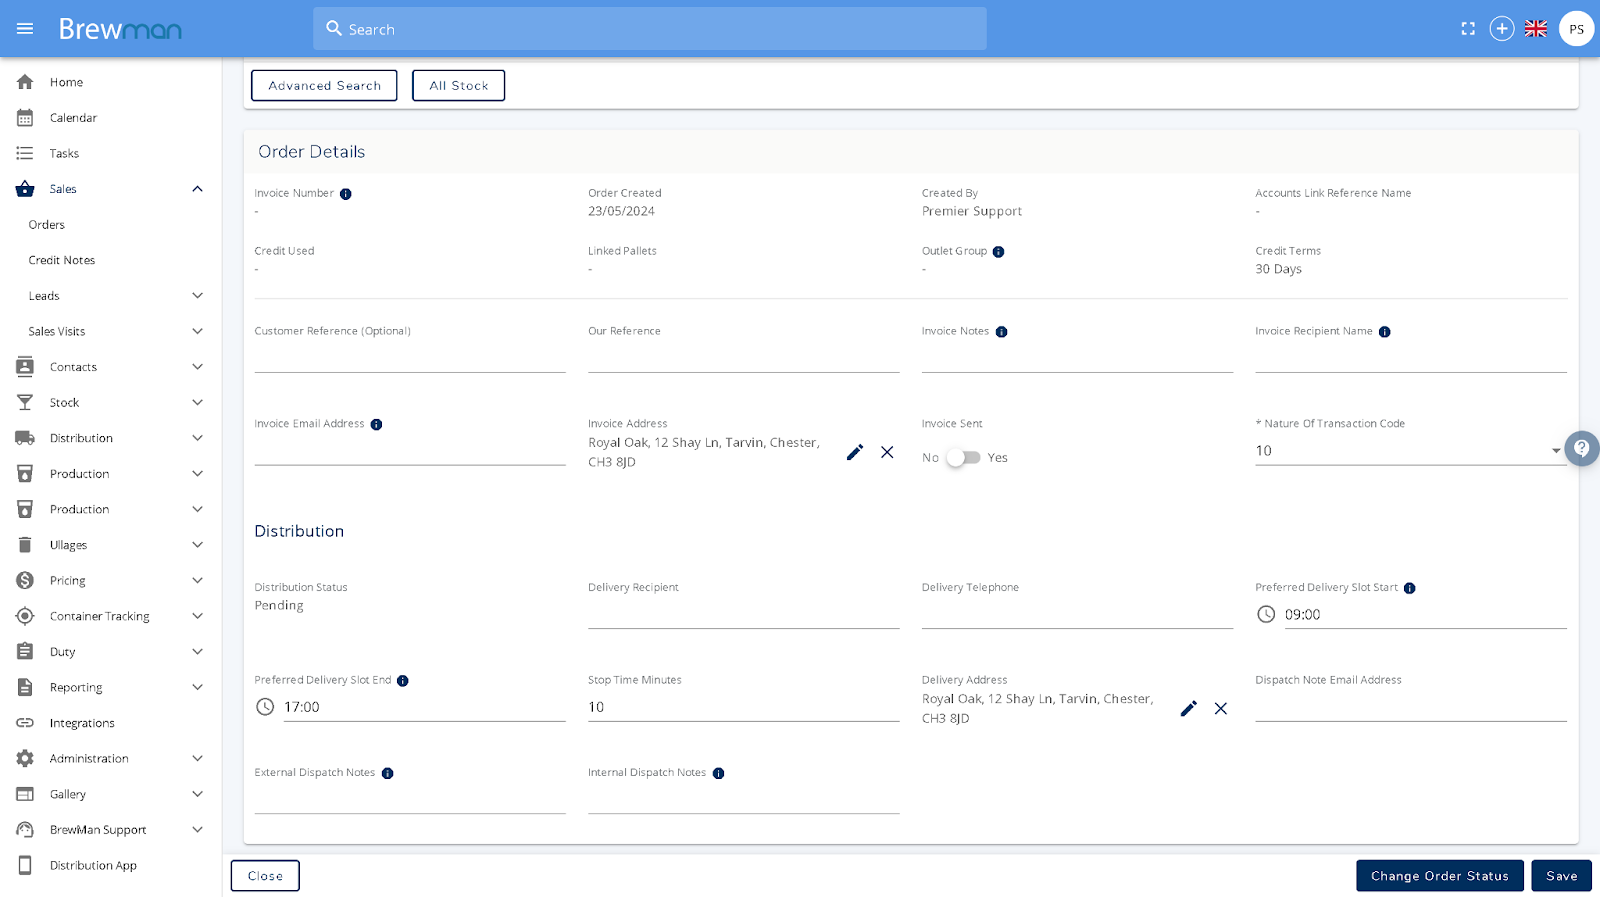
Order Details:
- Customer Reference - A free form box for you to enter information into.
- Our Reference - A free form box to enter information into.
- Invoice Notes - Any notes added to the invoice (these will be generated on your invoice if the tag is included on your document template).
- Invoice Recipient Name - The name of the person you would send the invoice to.
- Invoice Email Address - The email you want to send the invoice to (this will generate when clicking the email document button but can be manually changed).
- Invoice Address - Where you would like the invoice to be sent.
- Delivery Recipient - Here, you can enter the name of the person the Order should be delivered to.
- Delivery Telephone - The contact phone number for the Delivery Recipient.
- Delivery Address - This is the address the order will be sent to. It will only be displayed if the Distribution Type is set to Delivery or Courier.
- Dispatch Note Email Address - The email you want the dispatch note to be sent to.
- External Dispatch Notes - A free form notes field that will show on the document template.
- Internal Dispatch Notes - A free form text box that is internal to you so the custom does not see it and it appears on the Distribution App for your drivers (If you use it).
Find Products:
- Using the dropdown list, select the Product. You can also type in part of the Product Name , such as “IPA” to display only Products with IPA in the name. Please note that this list will only display Products that are available on the selected Price List and the Stock Location.
- Qty Available - The stock available for sale. This is the number of products In Stock minus those that are Outgoing (For Stock Transfers or other Orders).
- Qty - The amount the customer is purchasing.
- Click Add to add this item to the order.
If you want to find a specific product you can click Advanced Search and filter by:
- Stock Location
- Product Brand
- Package Type
- Supplier
If you want to view a list of all Products and their available Stock, click All Stock.
- Stock Location - You can select the Stock Location from the top left using the dropdown list.
- Search - allows you to find a particular Product.
- Filter **/Sort** - Using these filters, you can display only certain information. An example is Available set to greater than 0. This will display everything that has available stock in the selected Stock Location.
- The Products are displayed in the table. You can enter the Qty required and click Add to add the Product to the Order. You can add multiple Products this way.
Converting Orders from Draft to open:
- If an order is labelled as “Draft” then you will be able to send a Pro-Forma invoice out but you will not be able to mark it as “Complete” or post it to accounts.
- To do this you have two options, you must either change the Order Status in the orders list by selecting the 3 dots and Change Order Status, finally selecting Confirm Draft Order or clicking into the order and toggling Draft to No.
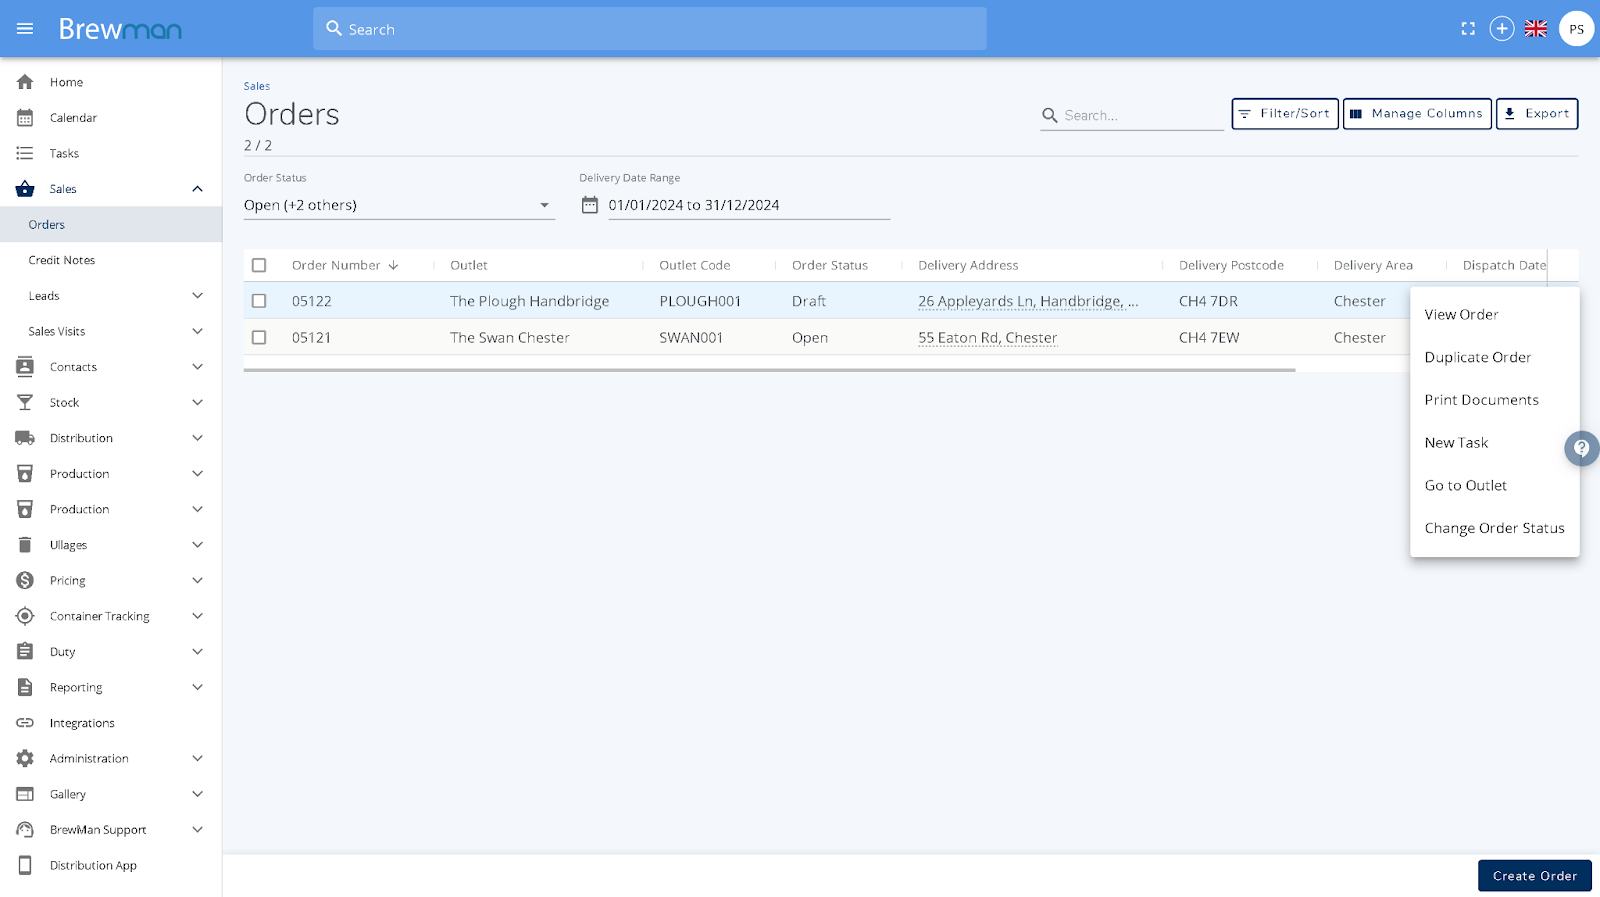


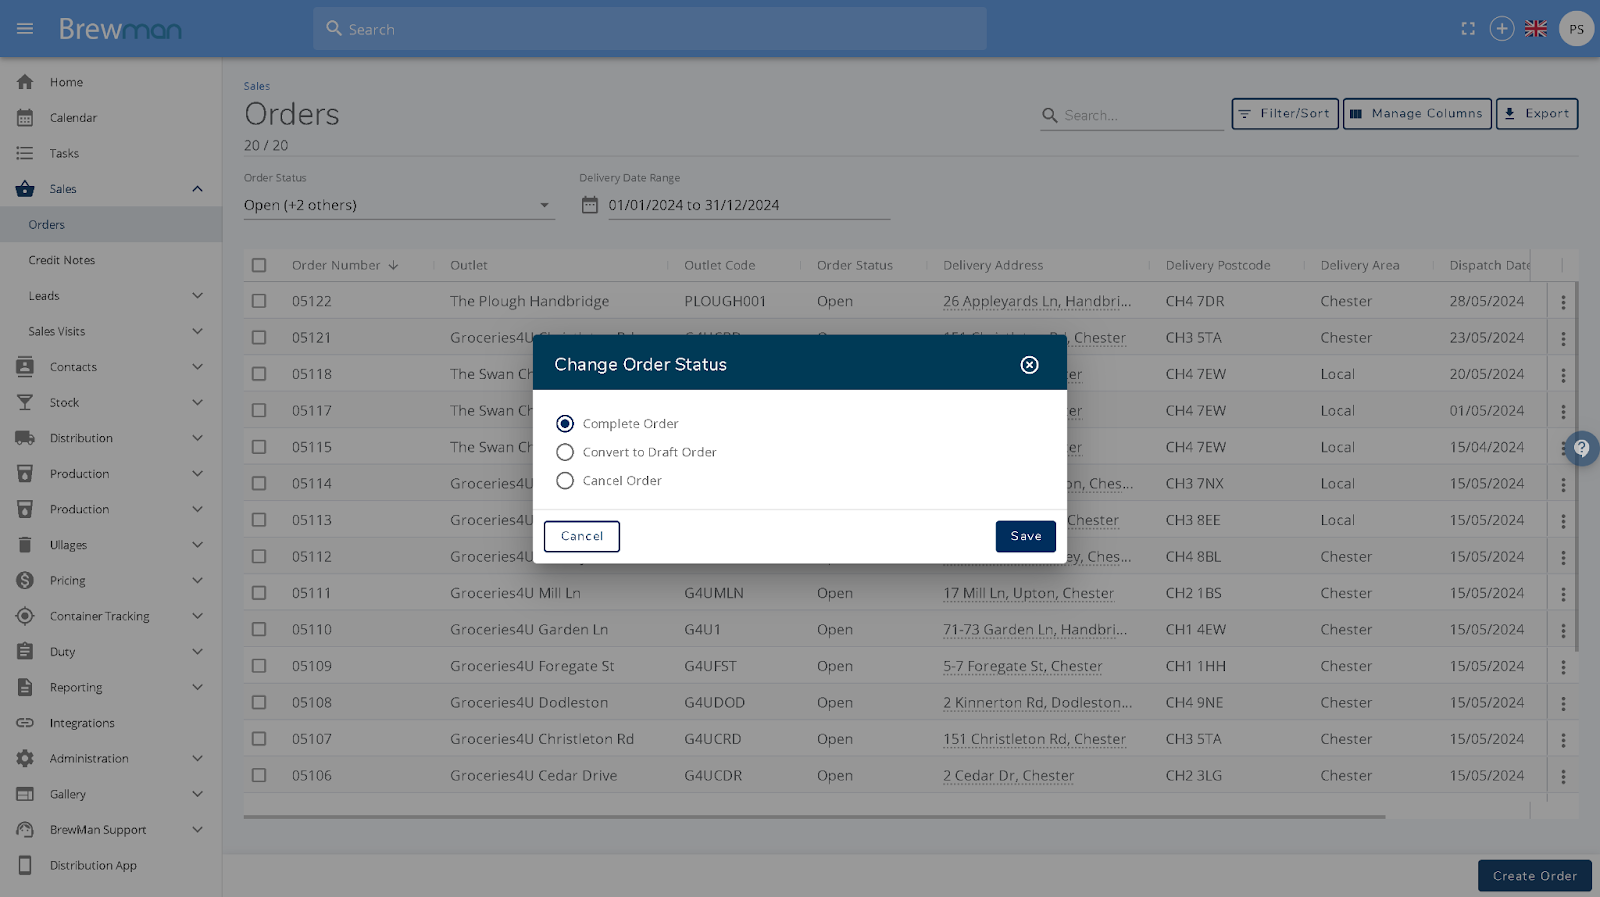
Completing Orders:
To complete an order you have three options, but it must be in an Open state.
- Click into the orders list and use the 3 dots to change the order status to complete.
- Click into the order and select Edit order. Then change the order status to complete
- Go to Distribution Processing and tick any orders that need to be complete per section. Then select the Complete Selected button.