How To: Tips for Making Changes to and Uploading your Custom Documents
How To: Tips for Making Changes to Custom Documents and Uploading your New Documents
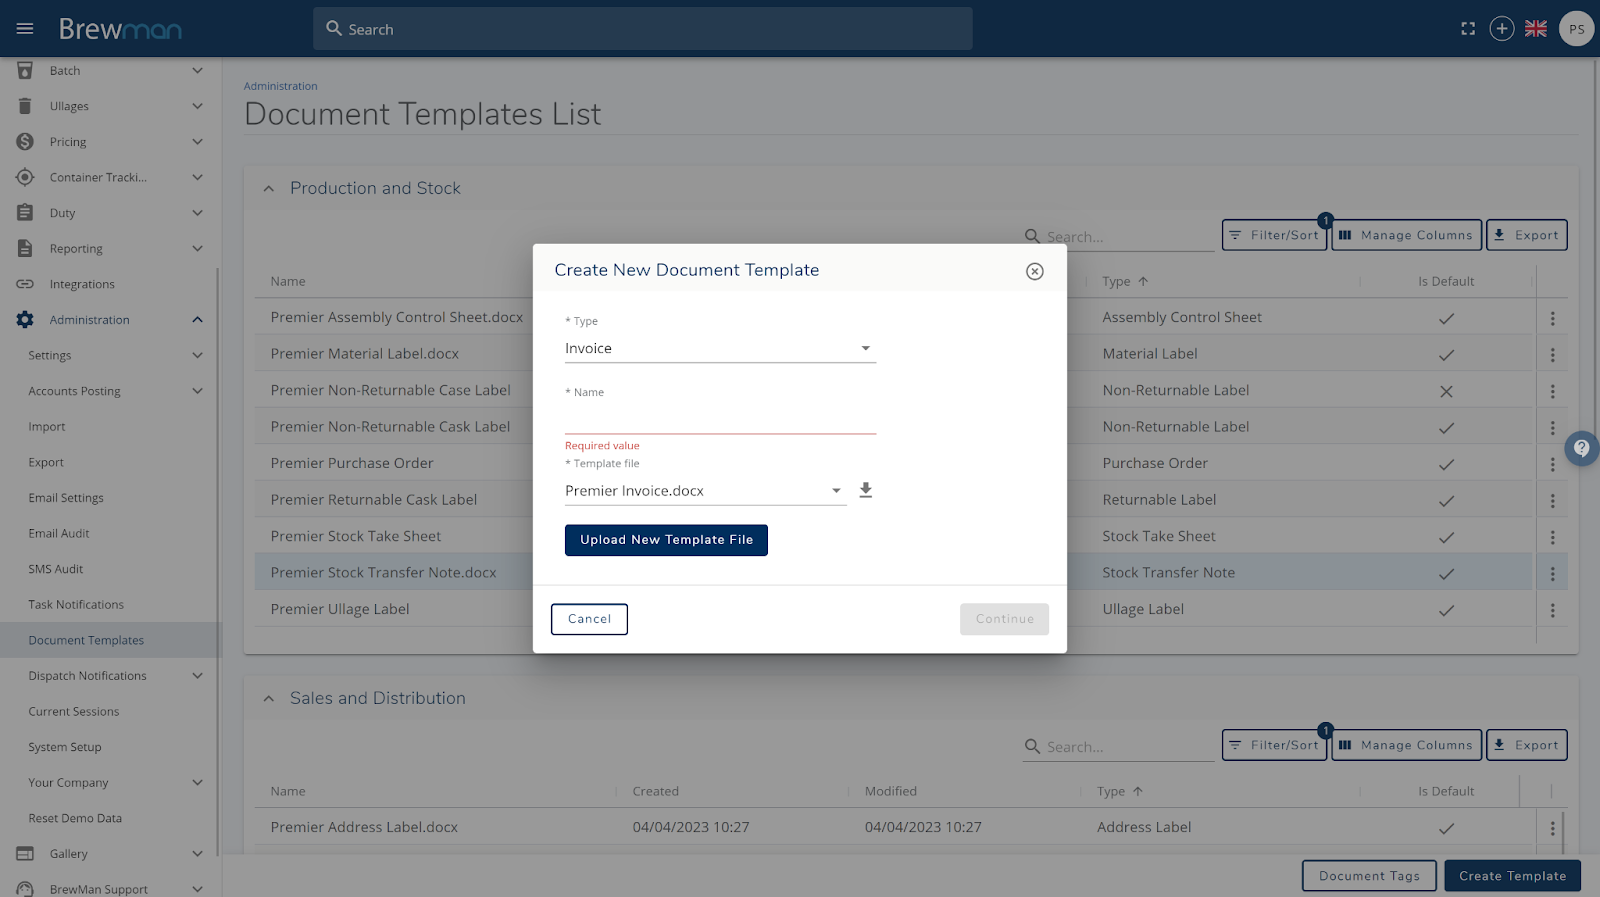
Go to Administration - Document Templates and click Create Template in the bottom right.
Enter the type of document you are wanting to create and the template file then select the Grey Arrow to download a new file of this document.
The image below is an example of how the invoice document comes as default via the download.
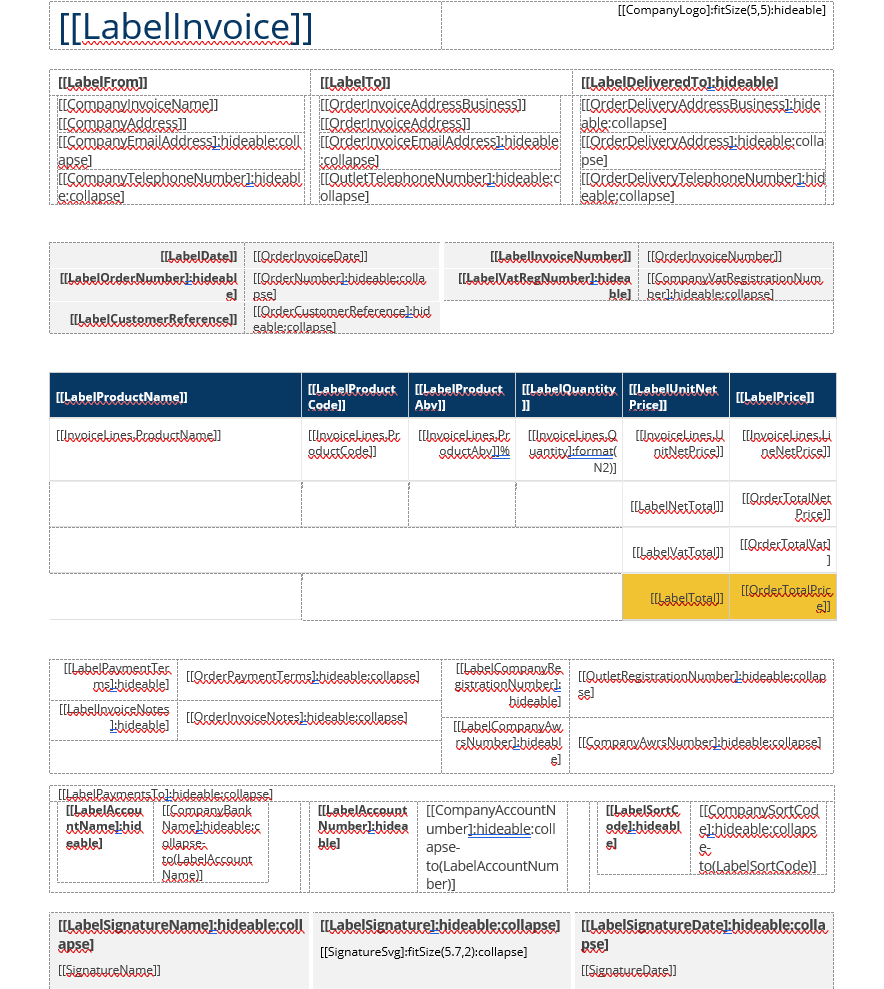
All the information in square brackets “[[ ]]” are called Tags. This allows BrewMan to pull relevant information for a document when it’s generated such as an Outlet Name, Email Address or Product Name.
In Administration - Document Templates - Document Tags you will be able to open the specific document type and it will show you every tag available for this document.
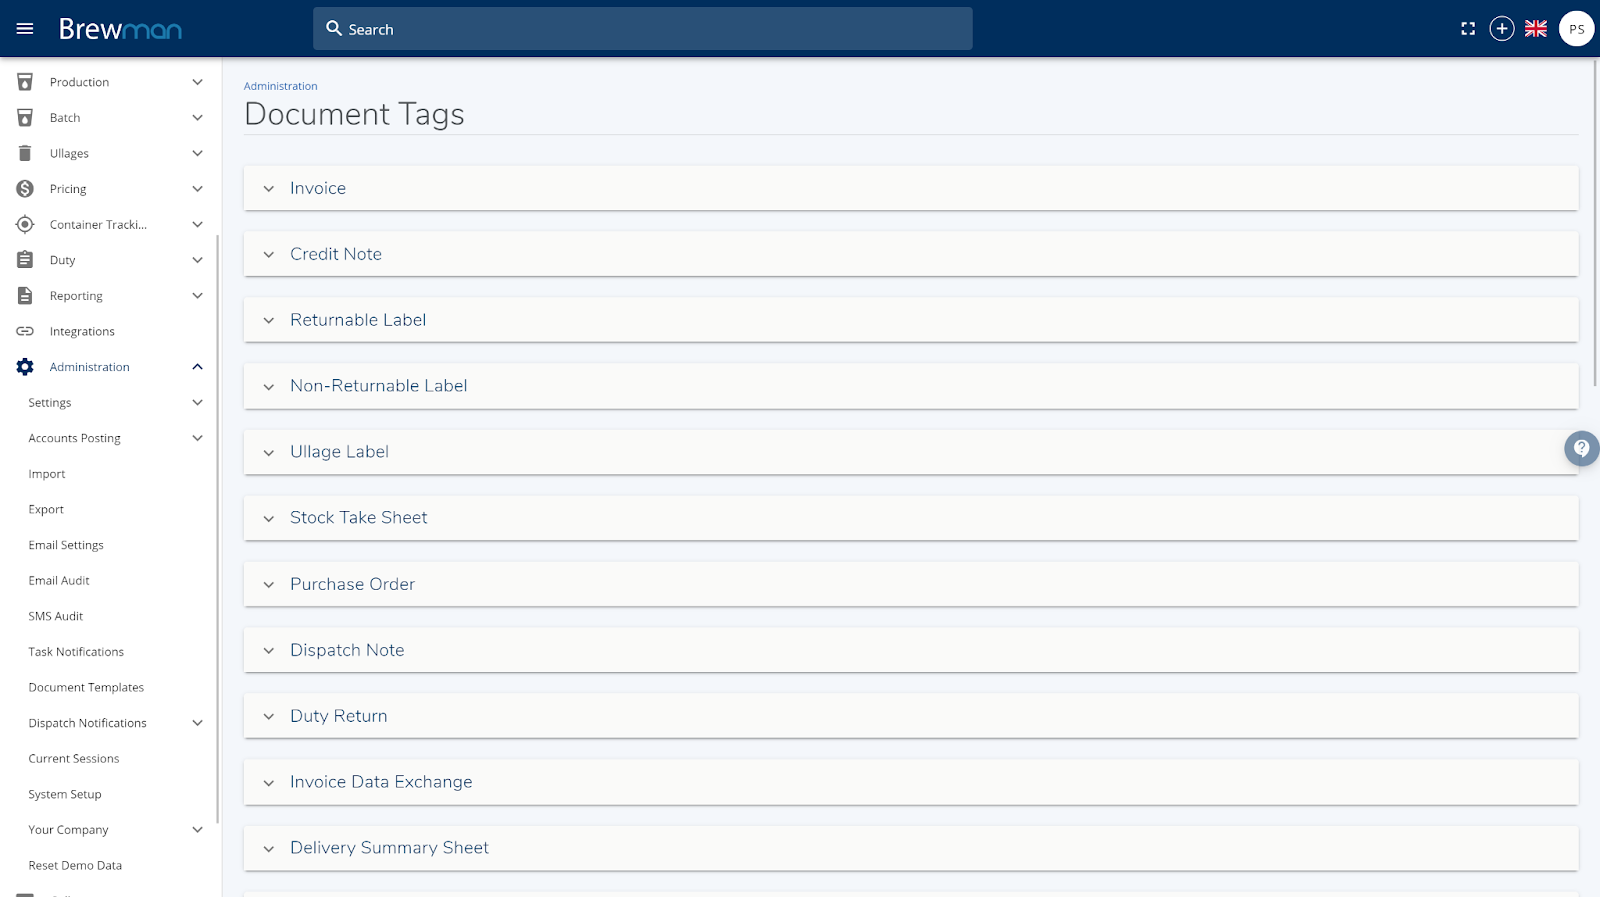
The link to our Document Tags page is here: https://brewman.premiersystems.com/administration/documents/tags
All tags MUST include two square brackets on both the beginning and end with no spaces between. E.g. [[Company.AccountNumber]]
If a tag is not available, please use our Hellonext board to request that it be added. Please follow this link: https://features.premiersystems.com/
Quick Tips:
If you want to make the tags bold, highlight the tag on the document and click CTRL + B. This will prompt the command to bolden your highlighted word and this will reflect on your document template once uploaded to the system.
The above also applies if you are wanting to resize text, highlight the text and using the command CTRL + SHIFT + . (To increase the font size ) or CTRL + SHIFT + , (To decrease the font size).
To Copy and Paste the tags, highlight the tag you are needing to copy from the document tags page and click CTRL + C. Now go to your custom document and select where you want to paste this and click CTRL + V.
If you want to add manually entered information, you can type this directly onto the document and where you want it.
To add the option to hide/collapse the tag if no information is generated, you can enter*:hideable:collapse]* after the first square bracket on the end of the tag. E.g. [[Company.AccountNumber]:hideable:collapse]
To resize a logo or signature field, you will need to edit the Numbers on the end of the tag and not the font size. E.g. [[CompanyLogo]:fitSize(5,5)] you would change the end to be a lower number to make it smaller and a larger number to make it bigger (4,8)/(6.3).
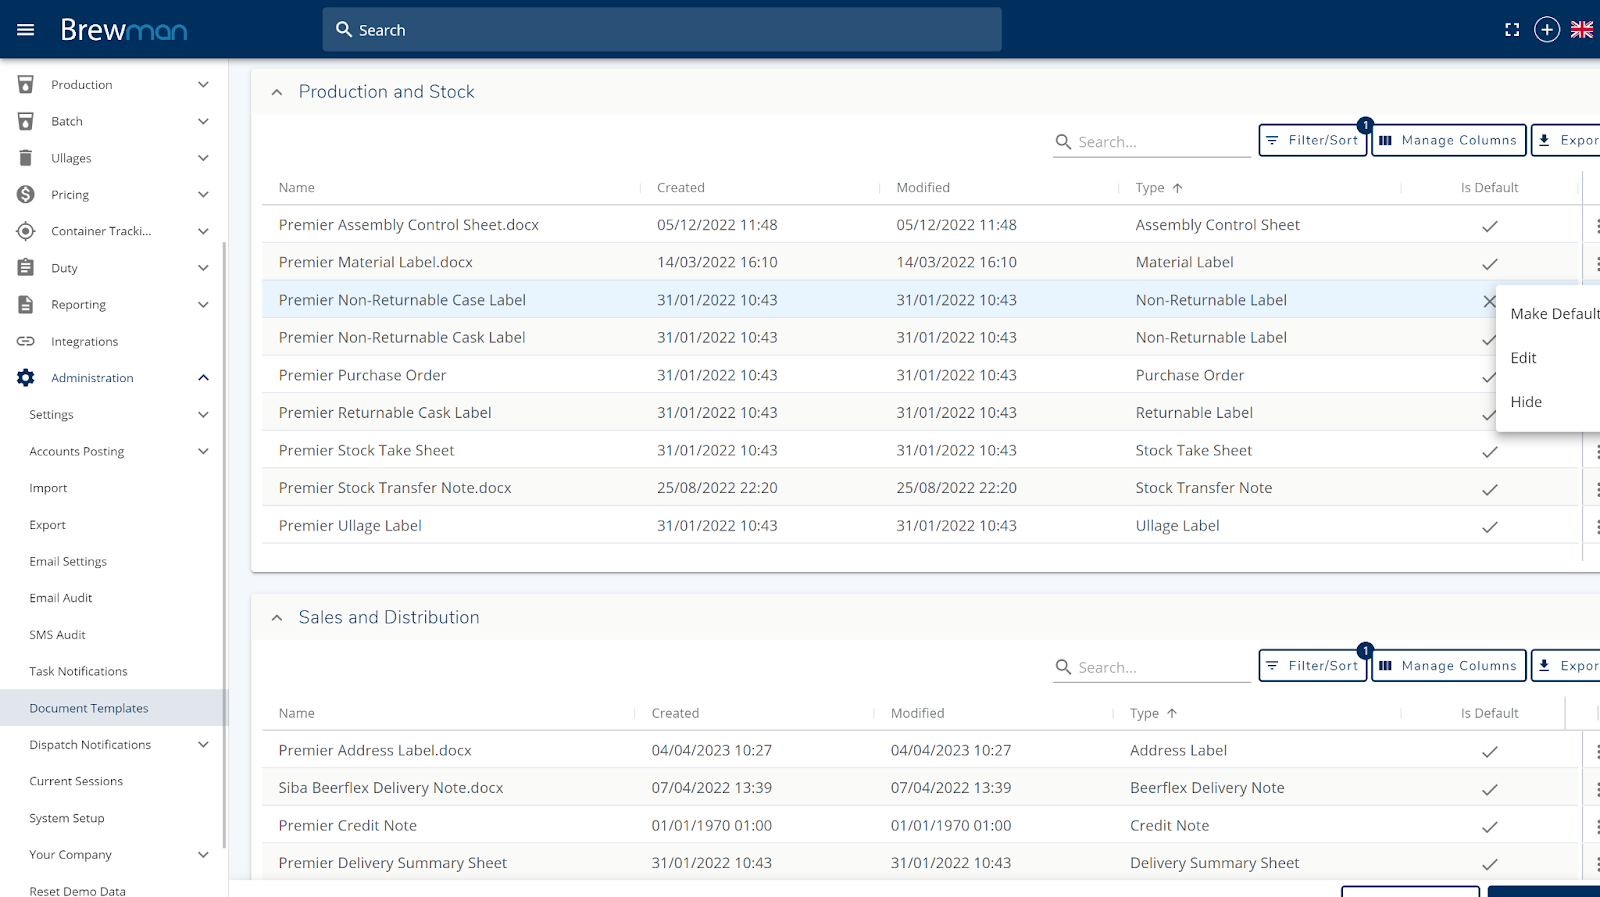
If you want to make a document default, go to Administration - Document Templates - Click the 3 Dots of the document and select Make Default.
To upload a document go to Administration - Document Templates - Create Template - Enter the Name, Document Type and then select Upload New Template File. This will open your file explorer and prompt you to choose your custom document.
Once you have your document uploaded you can edit the email section and settings;
Email:
BCC: Enter an email address that you would like to be blind copied into the email. You can enter your own email address if you'd like to double-check when these are sent.
Subject Line: This will be the default Subject Line on each email.
Email Body: This will be the default message body on each email sent.
Settings:
If you would like to change the name of this document or whether it is used as default
If you need any further assistance on changes to a document, please contact our support team.
_ *Email: support@premiersystems.com *_
_ *Tel No.: 02380 811 100 *_